
Console
The Datomic console is a graphical UI that makes it easy to work with Datomic databases. It provides tools for exploring schema, building and executing queries, examining transactions, and more.

This page describes how to launch and use the Datomic console.
Starting the Console
The console is a web application, to run it you have to start its server by running the bin/console command:
bin/console -p port alias transactor-uri-without-db [alias transactor-uri-without-db]+
The -p switch specifies a port for the server to listen on. The alias is a text-based name for a transactor that is associated with a transactor URI that does not include a database name, for instance, datomic:dev://localhost:4334/. You can specify multiple aliases, URI pairs.
Here is an example:
bin/console -p 8080 dev datomic:dev://localhost:4334/
This command starts the console server listening on port 8080 with access to a dev transactor running locally and identifies by the alias "dev".
When the console starts, it prints a URL to browse to, typically
http://localhost:8080/browse/. Open this URL to start using
the console.
Specifying a Database
Use the controls at the top of the console to specify a database to work with.

Specify a storage and DB. The names in storage are the aliases you specified when you started the console server. The names in DB are the databases that exist in the selected storage.
You can also specify an as of or since to filter a database by time. Enter a t value, a transaction entity id, or press the calendar button on the right to pick a date and time.
Check the history checkbox to use a database that contains all assertions and retractions.
Exploring Schema
The schema tree on the upper left displays the attributes defined in the current database.
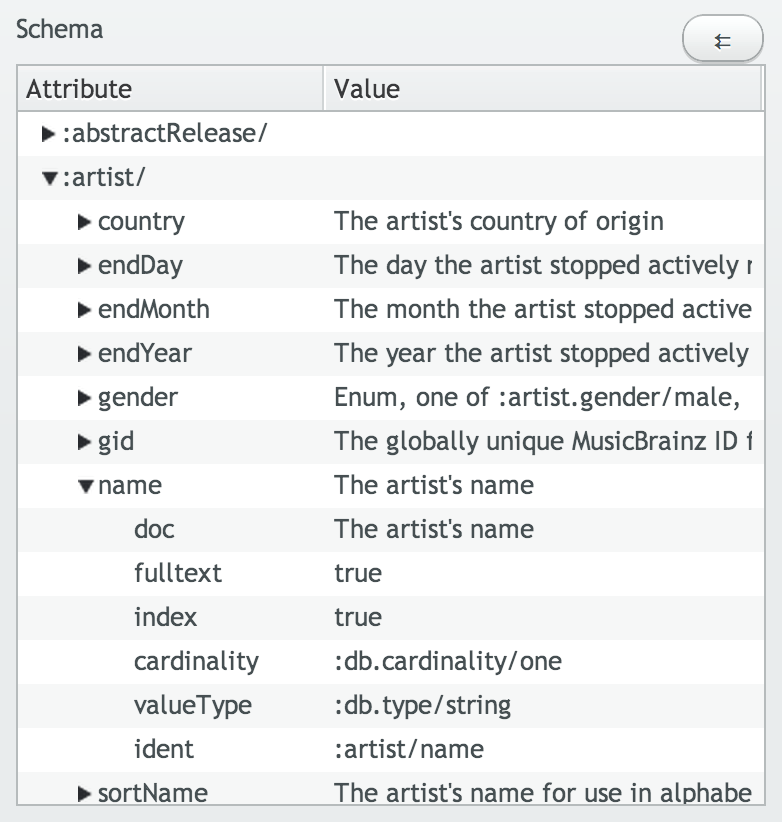
The top of the tree lists attribute namespaces. Under each namespace is a list of attribute names. Under each attribute is a list of its properties, for example, it's valueType and cardinality.
Exploring Data
The tabs on the upper right allow you to read data from the current database.
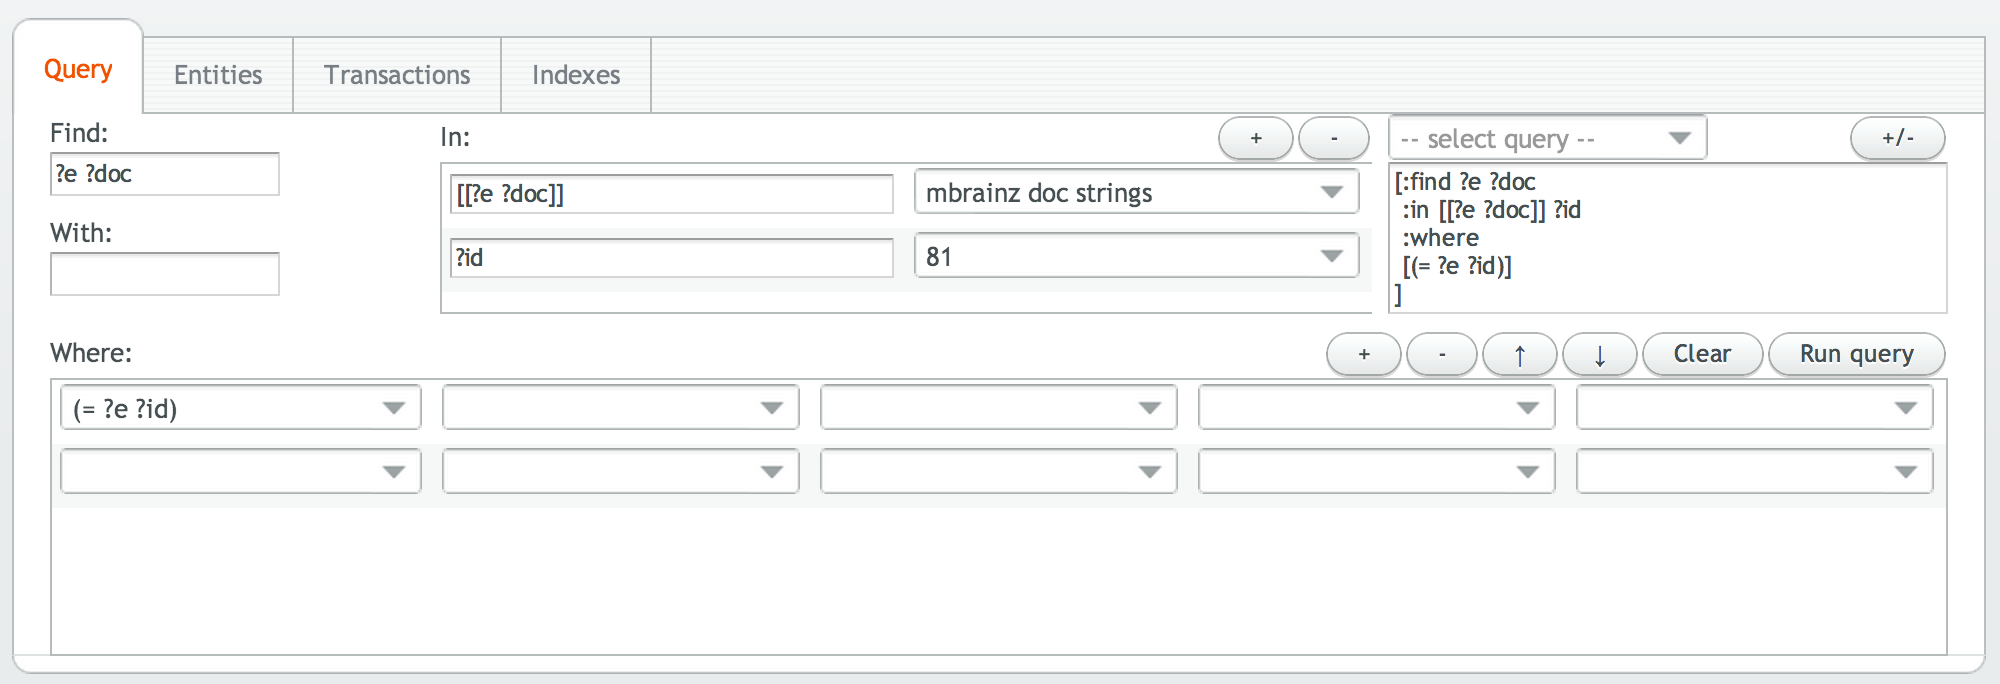
Query
Use the query tab to build and execute queries
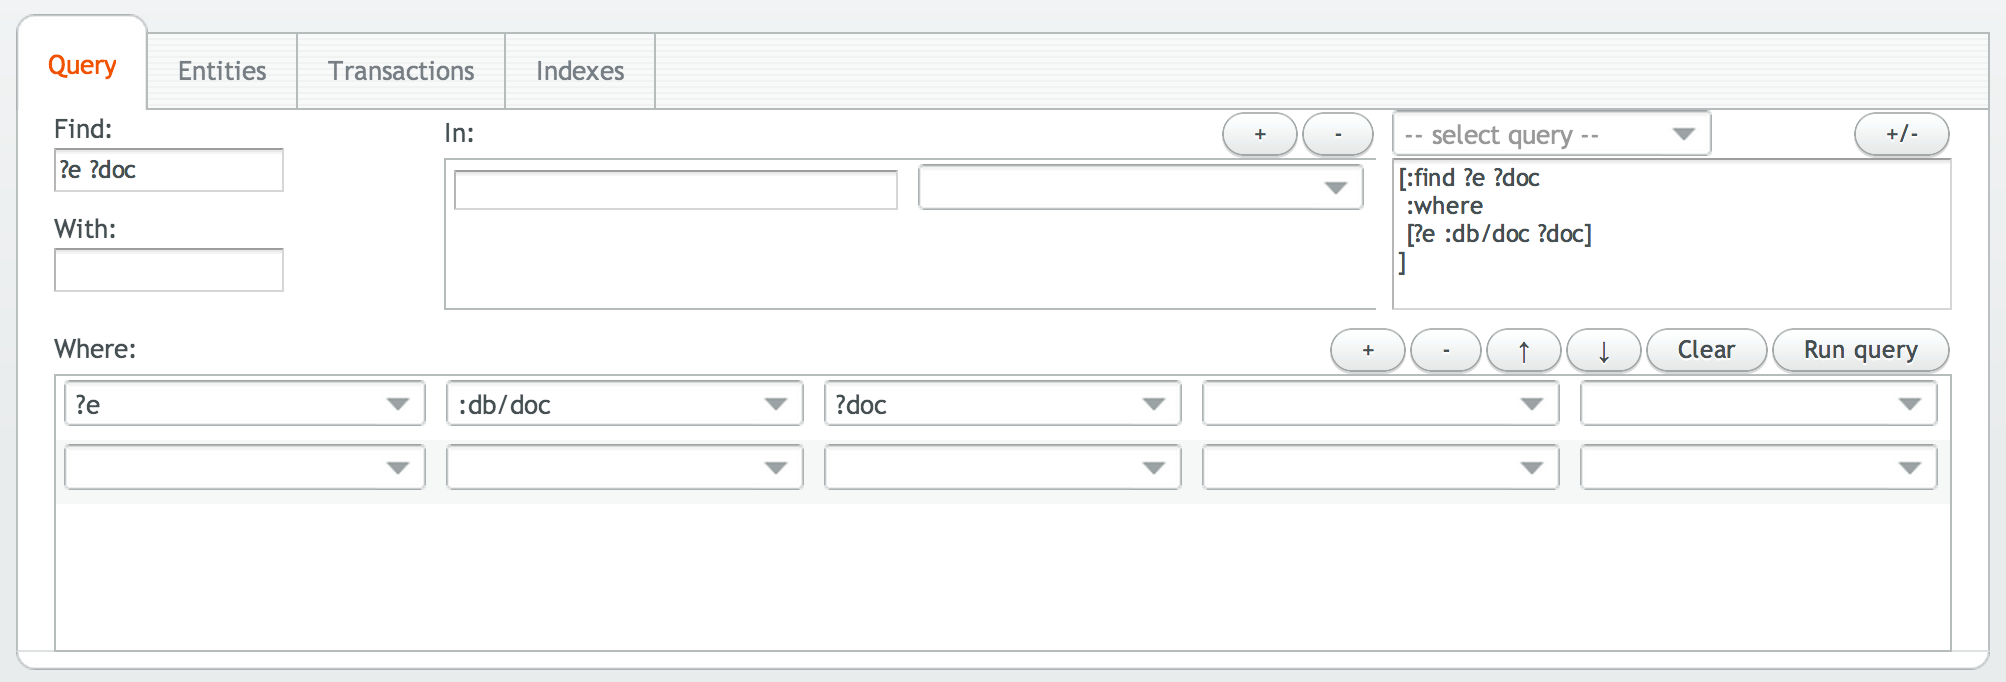
The current query is shown in the text box on the far right, just above the Run query button. You can edit the current query using individual text and combo box controls or by editing the query text directly - the two are automatically kept synchronized. You can copy from and paste to the query text box, so it's easy to go back and forth between the console and application code.
- Use the find field to specify a query's :find clause.
- Use the with field to specify a query's :with clause.
- Use the where table to specify one or more :where clauses. You
only need to specify as many values as the clause requires, starting on the left.
You can add and remove rows using the + and - buttons just above the table. You can move rows up and down using the arrow buttons just above the table.
Use the in table to specify the :in bindings. The column on the left specifies the binding, and the column on the right specifies the value for the binding. The value can be the explicit value or the name of a data source (described in data sources below). You can always use the value $ to refer to the current database.
Press the run query button to execute the current query. The results are displayed in the data set table on the lower right.
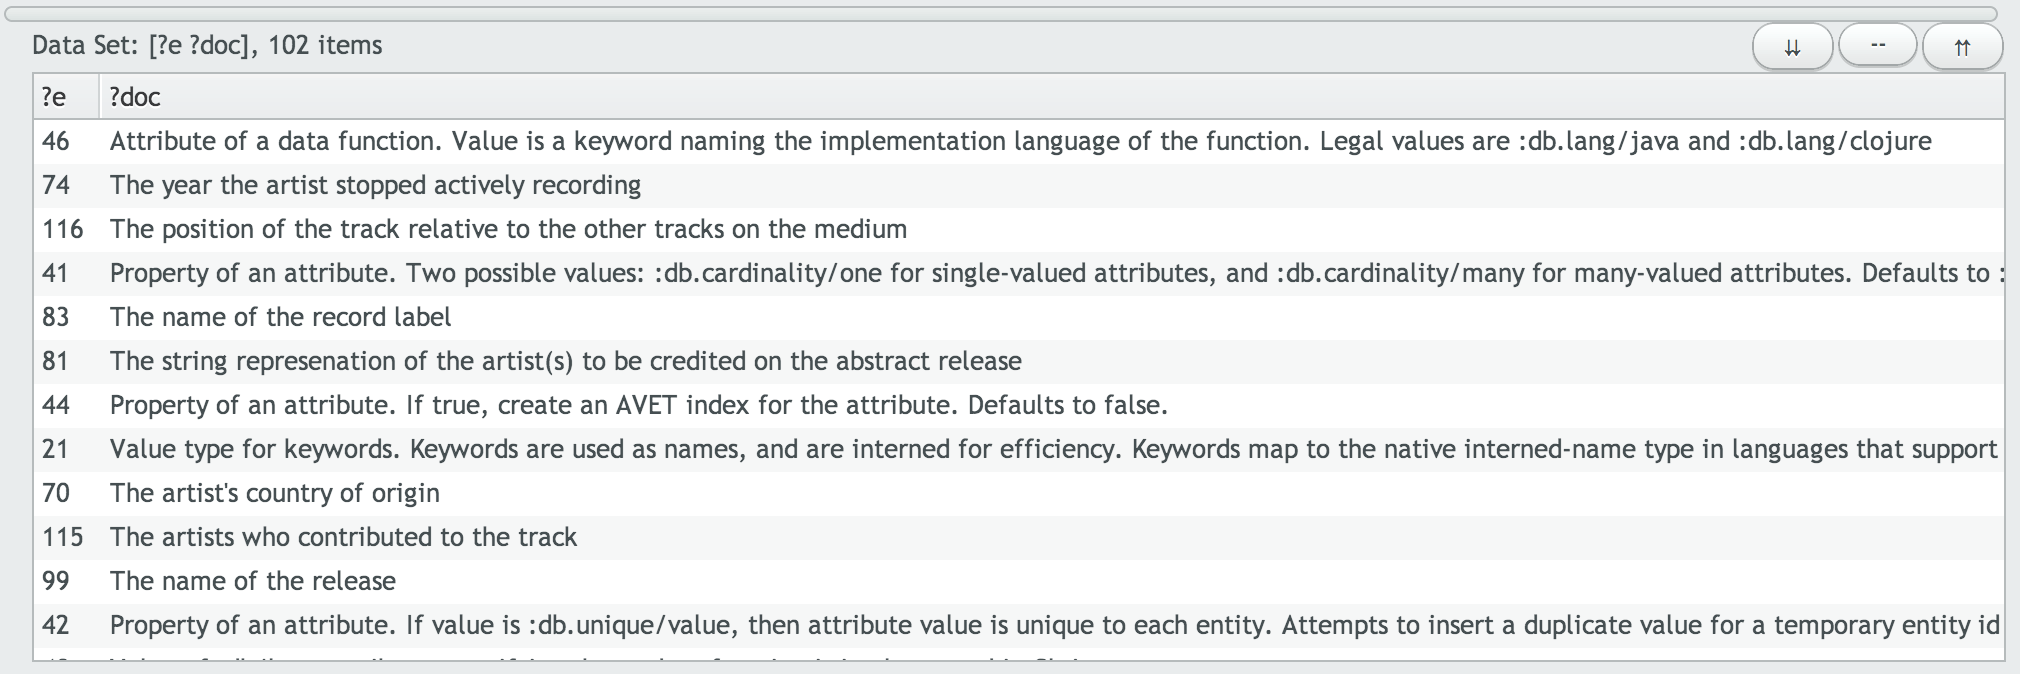
The caption shows the shape and count of the results. You can sort a data set by clicking on the column labels. If you click on an entity id from a partition other than :db.part/db in a data set, the corresponding entity will be displayed in the entities tab (described below).
You can temporarily save and reload queries using the + / - button and combobox just above the query text box.
Entities
Use the Entities tab to examine a particular entity.
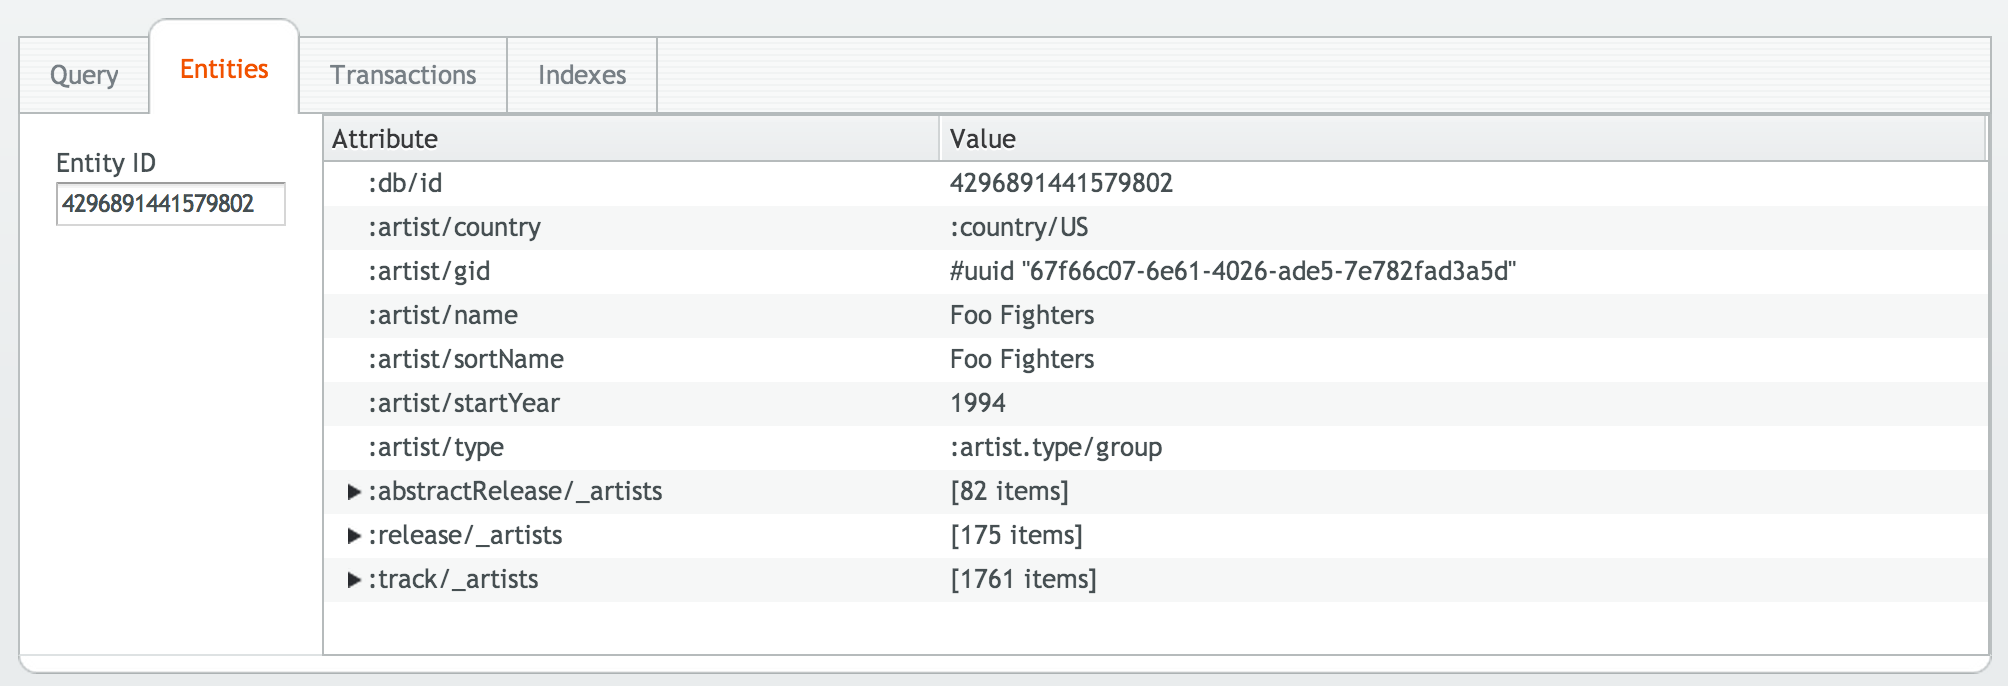
When you enter an entity id or :db/ident value in the Entity ID text field on the left, the entity's attributes, and their values are displayed in the tree on the right.
If the value of an attribute is a reference to another entity, the referenced entity can be expanded and examined.
If the entity being displayed is the value of a reference attribute on another entity, the referring entity can be expanded and examined.
This makes it possible to traverse an entire graph of entities, independent of which side of a reference you start on.
Transactions
Use the Transactions tab to examine a database's transaction history.
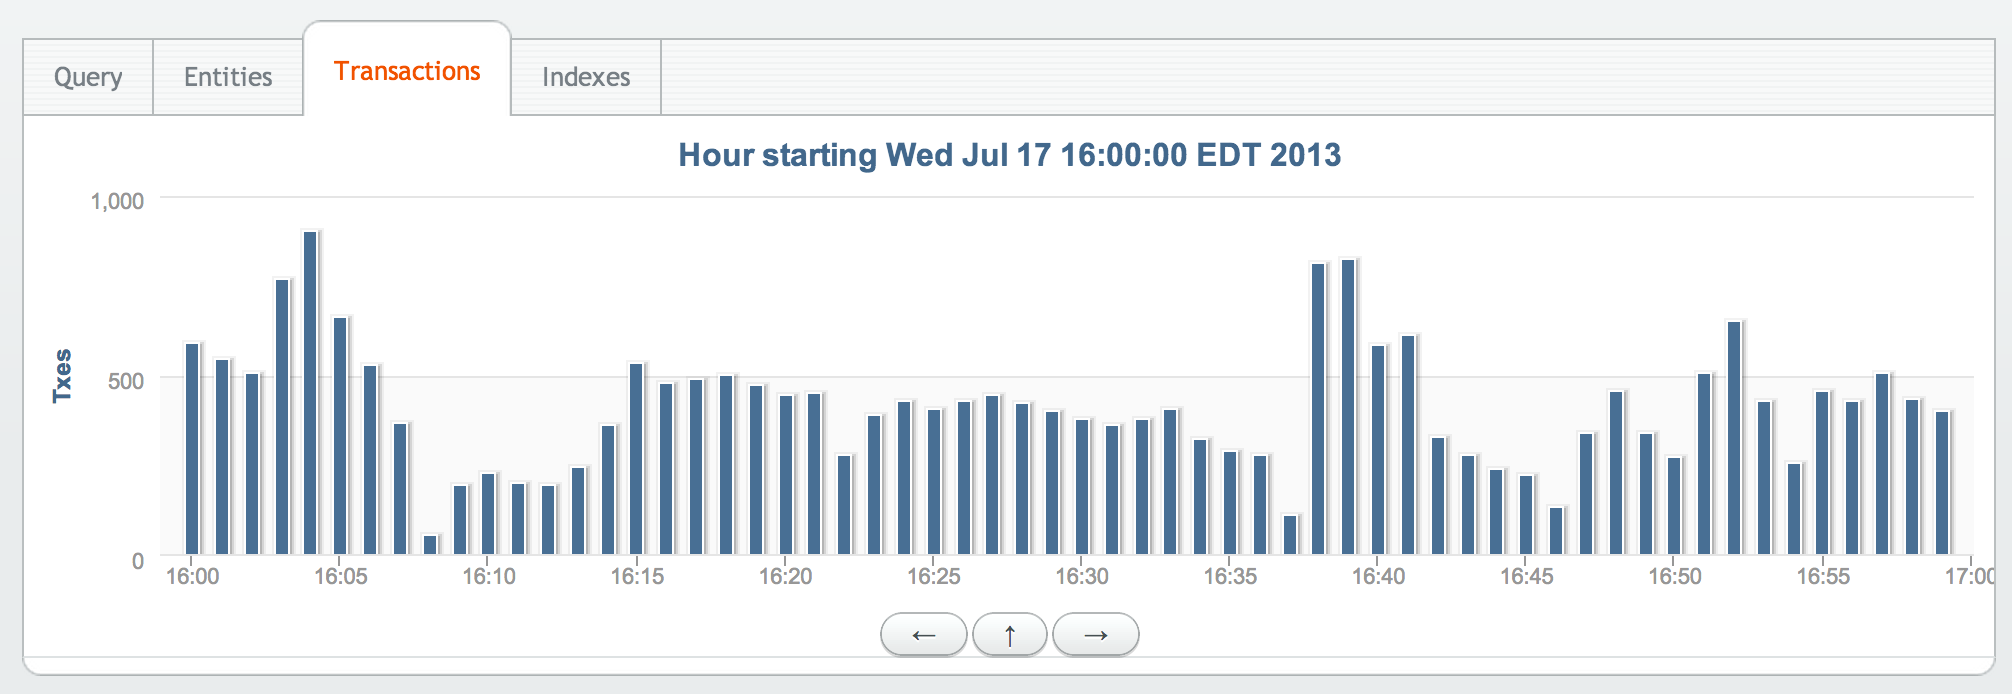
Transaction data is presented at Day, Hour, Minute, and Second scale. At Day, Hour and Minute scale, the bars on the graph represent the number of transactions processed. On the Second scale, the bars on the number of datoms processed.
Click on a bar to zoom in to the next scale. Once you are Second scale, clicking on a bar displays the associated datoms in the Data Set table on the lower right.
Click on the up arrow button to zoom out a scale. Click on the right or left buttons to move forward or backward in time at the current scale.
Indexes
Use the indexes tab to look up specific data or ranges of data directly from an index.
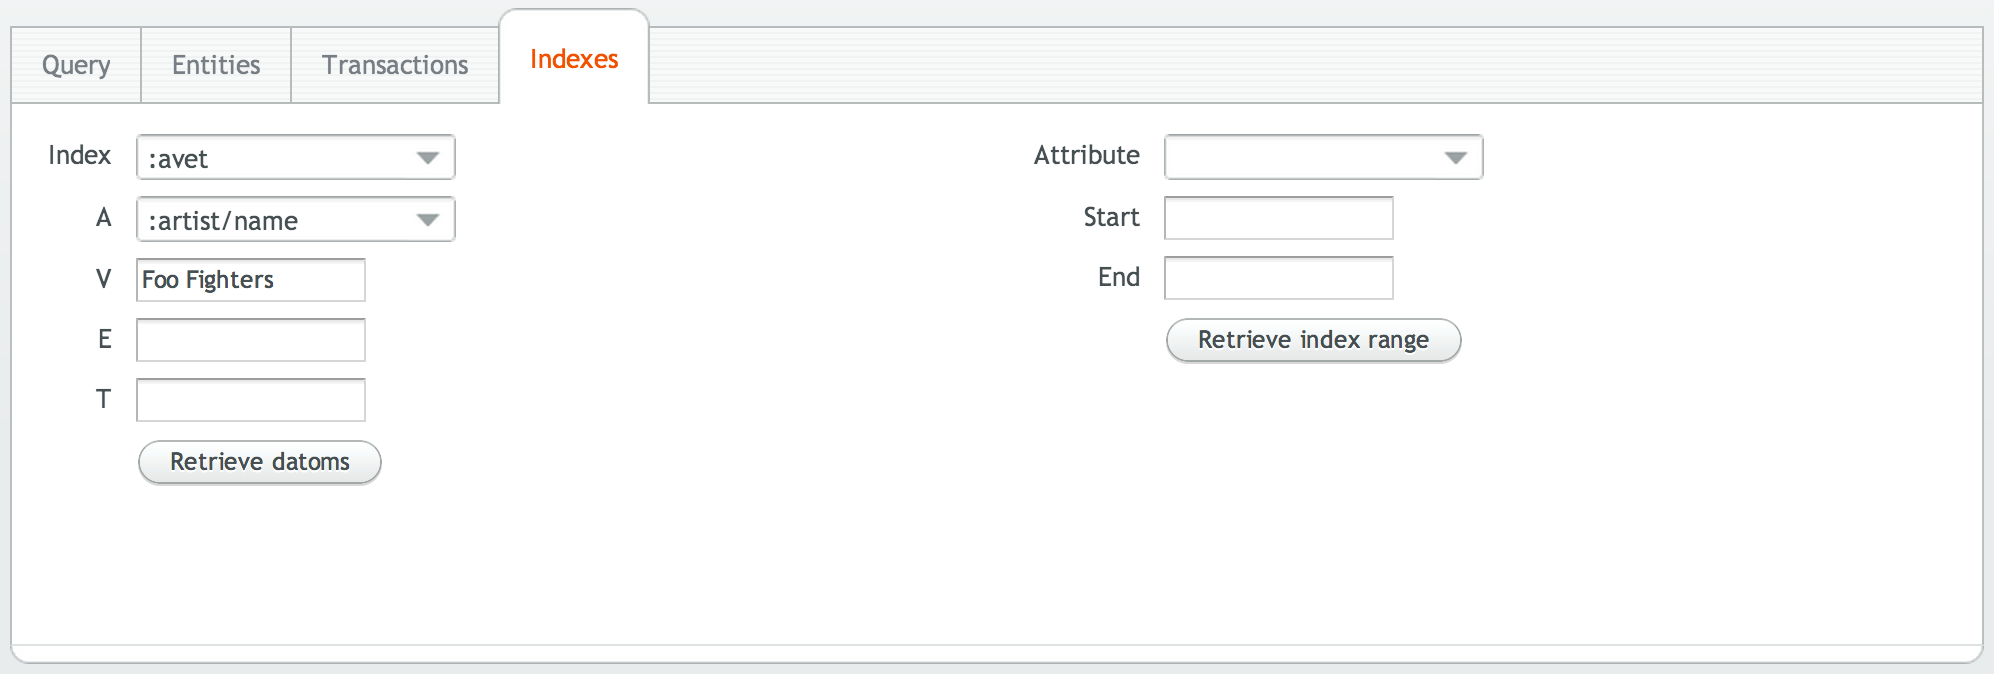
The results are displayed in the data Set table on the lower right.
Data Sources
Use the data sources table on the lower left to save and manage data sources for use in queries.
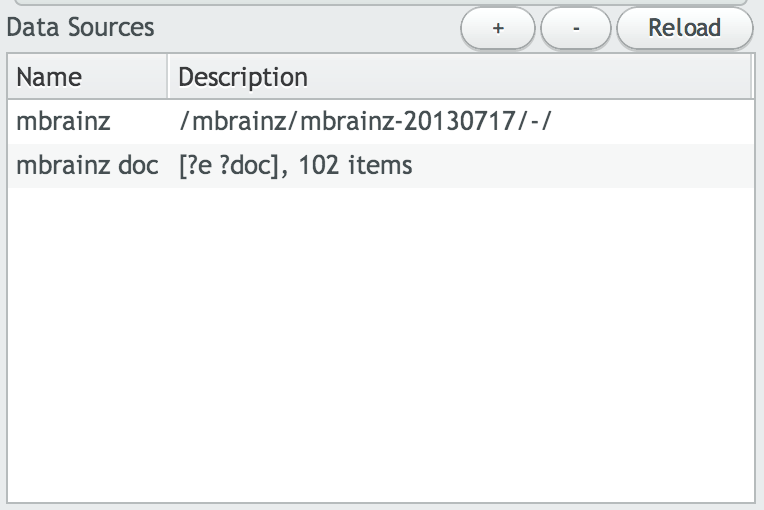
A data source is a named value, either a database specification or a data set. A query can use a data source name as the value of an input argument.
Use the + button to create a new data source and the - button to delete a data source.
Once a data source is saved, you can use it as an input argument to a query.
If your data source is a database, specify it as the value of an in parameter bound to $, $1, $2, etc., as shown below.
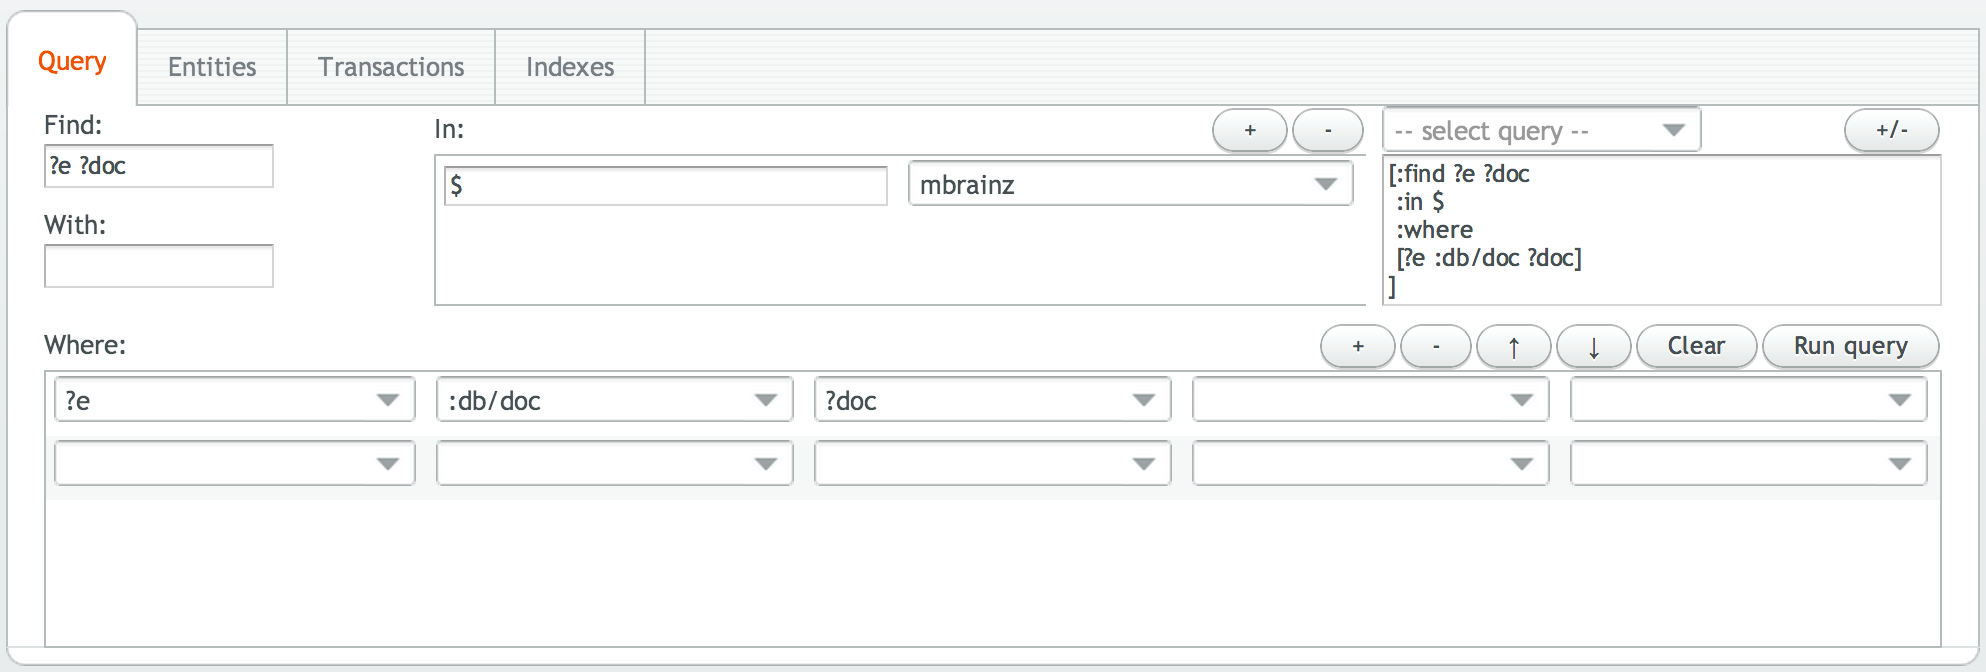
In the first example, the data source mbrainz is bound to $, which is used by default in the where clause.

In the second example, the data source mbrainz is bound to $1, which must be explicitly specified in the where clause.
Use $1, $2, etc. if you want to query across multiple databases.
If your data source is a data set, specify it as the value of an in parameter bound to a tuple that matches the shape of the data set, as shown below.
This example uses a code where clause instead of a data binding where clause as a predicate for tuples in the data set. This approach is required when the input data source is not a database.
Use the reload button to reload a data source. For databases, this resets the current database specification. For data sets, the data is reloaded in the data set table.